
Handmade Bookmarks

When you guys create something, what do you do with the leftover papers and things you have from that first project?  For me, it all starts after I have finished up a project - I then take the papers left over, and create until I can't create anymore!!!  The papers are then put in my bin for use later on when I need them for paper piecing patterns, die cut shapes, punch shapes, stamped images or just little details on tags or cards!  I save even the smallest of pieces, because they do come in handy!  If - after I have created just about everything I can out of the scraps, I can't use the smaller pieces anymore, I simply throw them away.  
Today's idea, is using up the papers I had from another project - a file folder mini album which will be shared another day!  The papers I used from the cards on this post, were also from that same album!  I created 2 different sets of corner bookmarks, and 3 different long bookmarks (all for sale if you are interested by the way) - and absolutely LOVE how they turned out!  

Supplies needed:
Scrap paper
Corner rounder or corner punches
Paper trimmer
Fine tip scissors
Various punches and die cuts
Basic adhesive
Hot glue gun

Corner style directions:
Step one:  Trim 2 2" squares for the bases.  Trim 1 2" square - cut in half corner to corner, creating the 2 pieces you need to put on the tops of the squares.
Step two:  Using your glue gun, place a small strip of hot glue around the 2 edges to put on top of the bases.  You will leave the long edge free - this is where the corner of the page goes on the book you are reading.  
Step three:  Add the embellishments for each of the 2 bookmarks - they can be alike, or (like the pink set) each with different embellishments!  
 
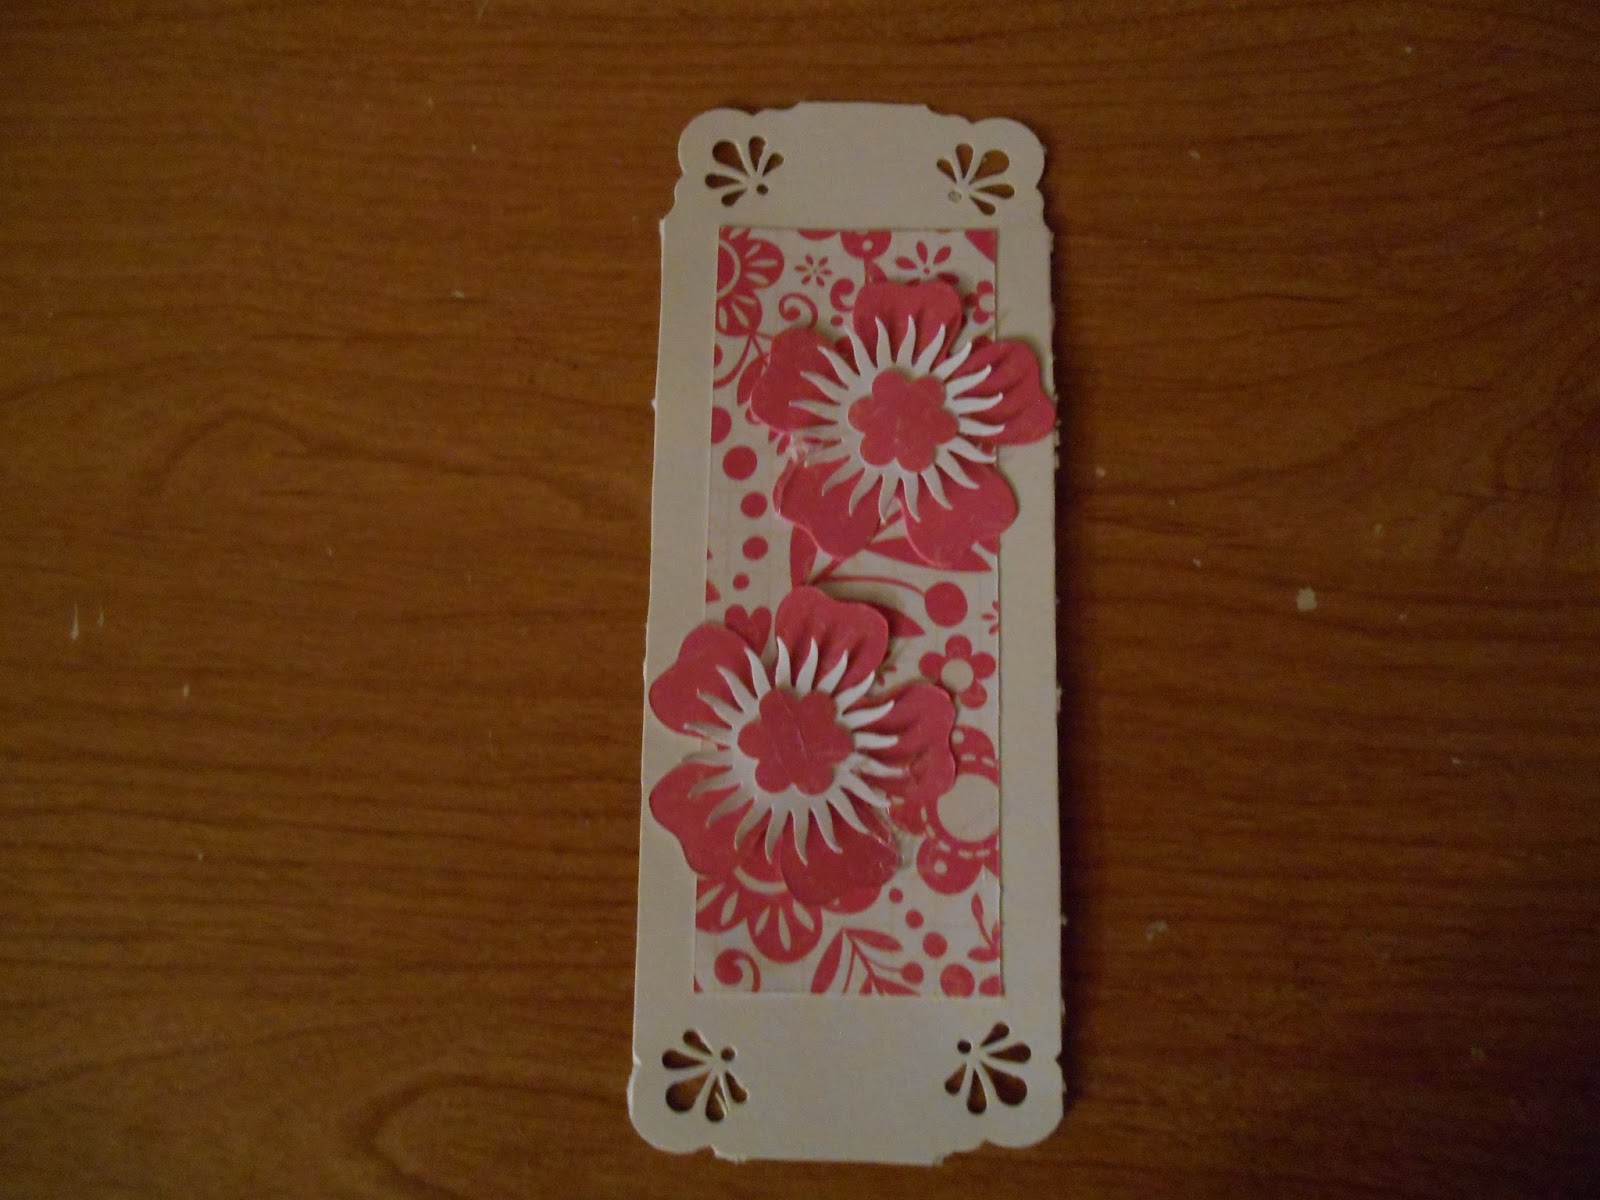
Long style directions:
Step one:  Cut your bases 2 x 6" for
each of the bookmarks you want to do - bases can be any color you want! 
Step two:  Using either a corner rounder - or a decorative edge corner rounder, round all 4 corners of the bookmark.  
Step three:  Using your scraps of paper, add your background paper to the back of the bookmark.
Step four:  Add the embellishments to each of the bookmarks you are creating! 

When it comes to gifts, whether it is for something specific or just because - how fun would it be to add a bookmark to a page in a book, picked out just for that person!  Make a few up ahead of time, and give them out when you want to just give a little something special!
If you decide one of these handmade creations have to be in YOUR home, let me know!  The corner style bookmarks are $2.50 for 2 of them, and the long style bookmarks are $1.75 each!  Email me at memoriesintyme@gmail.com and we can get the process started!  
Until next time,
Lynda Jeffs
Memories in Tyme
      

Comments

Popular posts from this blog

Fall Blog Hop

We're so happy you could join us for this super-fun hop showcasing cards, layouts and projects that are All About Fall Day 2!!  You'll find an array of ideas throughout the hop -- From decorations to gift ideas and more, we hope you'll enjoy each and every project along the way!! This is a TWO-DAY hop, so be sure to catch both days for maximum ideas (you'll find the entire line-up below my post)!! Before the leaves change color and fall... let's get hopping!!  We have a WONDERFUL Grand Prize for one lucky hopper today -- A $25 Gift Certificate for Designs On Cloud 9!!  To be eligible, please visit each "Blog Hop Stop" and leave a comment!!  One random winner will be chosen on Wednesday, September 21st (giving you plenty of time to finish the hop)... For more details on what you could choose if YOU are the winner, please be sure to visit our sponsor: For today's project, I am doing a digital album, this one is   about each of the  s...

Fall Blog Hop

We're so happy you could join us for this super-fun hop showcasing cards, layouts and projects that are All About Fall!!  You'll find an array of ideas throughout the hop -- From decorations to gift ideas and more, we hope you'll enjoy each and every project along the way!! This is a TWO-DAY hop, so be sure to catch both days for maximum ideas (you'll find the entire line-up below my post)!! Before the leaves change color and fall... let's get hopping!!  We have a WONDERFUL Grand Prize for one lucky hopper today -- A $25 Gift Certificate for Designs On Cloud 9!!  To be eligible, please visit each "Blog Hop Stop" and leave a comment!!  One random winner will be chosen on Wednesday, September 21st (giving you plenty of time to finish the hop)... For more details on what you could choose if YOU are the winner, please be sure to visit our sponsor: For the hop today, I've created a fall layout that can be tweaked with different colors - or anything r...

Back to School Blog Hop

Welcome to the Back To School Blog Hop!! We're so happy you could join us for this super-fun hop showcasing cards, layouts and projects for Back To School!!  You'll find an array of ideas throughout the hop -- From teacher gifts to lunchbox notes, we hope you'll enjoy each and every project along the way!!  Class is about ready to start!!!   Several stops along the way will be offering some nifty prizes, so please be sure to keep an eye our for that!!!  You are at the beginning of the hop, so thank you for stopping by an let's get started!!!   Scraps of paper  For the hop today, I've created a simple bookmark!  With reading being the number one thing your kids will do in school, from text books to basic reading books, making bookmarks in their favorite colors are sure to be a huge hit...AND if you use up your scraps from other projects, then the cost factor associated to this is almost nothing!!    Supplies:   Scr...